Thursday, February 17, 2011

Pool cover finished


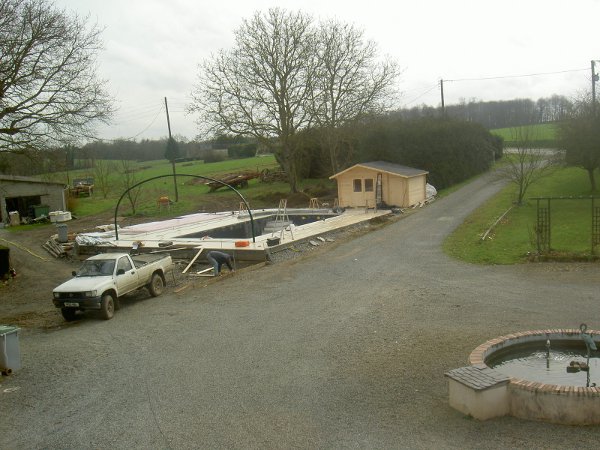
The pool cover is now finished. When I first started to think about a cover for the pool, I thought that I would buy a telescopic cover that opened up by pushing back ever decreasing sizes of roof and walls so that there was an open-air pool to finish. This was probably the most important decision of the whole swimming pool project, because (believe it or not) the cover costs more than the pool itself.

However, when I started to look at these covers there were two options :

on little wheels - which meant that it wasn't fixed to the ground and could fly away if there was a strong wind, which means that you have to bolt it down to the patio if there is a risk of wind. Well, the weather forecasts in France are about as good as in the UK - so I didn't want to risk that!

on rails - this seemed like a good idea at first, the rails are discreet - however, each section of the cover is a different size and for the length of cover that I needed (13 metres) I would need 8 sections, which meant 8 rails side-by-side across the patio - not pretty ...

The cover that I have opted for has a permanent roof, but the sides open with two windows in each section, this means that you can open one side, or the other, or both - or maybe just two sections if there is a prevailing wind, the closed side can act as a windbreak. Also you can just open a small section at the bottom allowing ventilation.

The ventilation is important - if it is a miserable day, you would keep the cover closed, but the fumes from the chlorified water are quite strong, so it is good to have a through current of air - this is not at all possible with telescopic covers.

The other advantage of the cover that I have, is that the roof is UV treated, so people who want to get a suntan can go and sunbath on the patio, but little ones in the pool are fully protected by the roof - an added advantage for me, because suncreams are a pool maintainers nightmare!

Tuesday, February 15, 2011

Pool cover arrives


Today was very exciting - up until now we've been very much on our own for the construction - but today they delivered the pool cover and tomorrow someone is coming to put it up - they should be finished on Friday. Next Monday a team arrives to fit the liner and connect up the pump and heating - all should be operational at the end of next week !!!!

Pool house finished


The roof is on and I've just finished laying the floorboards - all that's left to do is paint it - this is a job that I'm going to give to my parents when they come on holiday in two weeks time! Thanks Mum and Dad x

Wednesday, February 9, 2011

Pool House construction

The Pool house construction started today - went up really quickly - just the roof to go on tomorrow. One side of the house will be a changing room (the larger side) and the other side will be the pump/filter/chemical area.


Monday, January 31, 2011

Grouting, grouting, grouting


The paving slabs are now all laid (hooray!) Now for another time consuming job - I have to grout all the gaps in between. For those of you who have grouted tiles, this is nothing like the same job - the joints are 10mm and the stones are porous, the grout is a lime/sand mixture so you cannot just slap it on and swirl it about until it falls in the holes. It is a painstaking exercise of trouelling the mixture and pushing right down to the bottom of the joints. I have been at it for 4 days and I think that I've got another 6 or 8 days to do .... on my knees, bent over double with an icy wind bearing down on me. However, it is looking great. Because of the below zero temperatures at night, I am having to cover it up with polystyrene sheets to protect it each night - roll on the summer!

Monday, January 24, 2011

The icing on the cake!

Today I found that the easiest way to grout the edging stones for the pool (5cm thick and rounded edges over the pool) was to use a Lakeland Plastics disposable icing bag ! Went in a treat - as easy as making a cake :-)